Sunday, December 13, 2009

AWI Casuality and Disruption markers


British Grenadier systems works well with a few markers.They reduce record keeping and add that little bit of flavor to the battlefield.I first got the idea from Tarleton's blog(Giles)and decided I liked it a lot.Thanks Giles!:-)
First up is some causality figures that rotate as causalities are taken and removed after a complete rotation.In British Grenadier most units are 4 models to a base(some have 6)and so I decided on a triangle numbered 1 to 3 as the most practical.
The stones are used to mark a units disruption level that goes from 1 to 3 and is a special feature of British Grenadier that isn't used in the other GdB rules and really helps add the feel to the period.I've started off with 6 pieces per level.
Stones-Mine
Miniatures-Perry

Monday, November 30, 2009

Quick note on the redoubt

A question has popped up on two sites about how the cannon was placed in such a fortification.
I thought I would just answer it briefly by saying thick planks to either side of the redoubt were placed to act as a ramp and the cannon was hauled over was one option or simply moving the artillery in before completing the redoubt.:-)

Cheers
Christopher

Sunday, November 29, 2009

Bunker Hill full picture redoubt


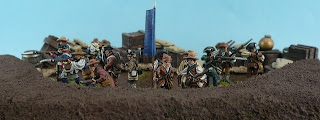
This is the Bunker Hill redoubt and one of the three fletches I made for an up and coming event using the British Grenadier AWI rule set at next years TACTICA event in Hamberg where we will be putting on a demo of The Battle of Bunker Hill.
The redoubt is pretty simple as was the actual one on the day of the battle.I'm not even sure they reinforced it with planking,but I wasn't happy with just a simple earth embankment and so I took a bit of artistic license and added a very simple planking scheme to the walls of the redoubt.I added some of my miniatures to get a sense of scale and I think the size will work nicely with what we have in mind.
BTW this Bunker Hill is the actual model for the game and the other one in the diorama's is only a corner piece used for an advert.The background is largely for color as I'm putting the focus on the redoubt.
Redoubt-Mine
Miniatures-Perry

Monday, November 23, 2009

Taking a closer look at dipped Trojan spearmen


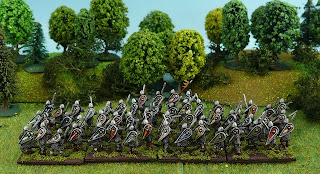
Here a a few closer looks for those that asked and that I haven't had time to put in.However,they are not to close,because pictures to close up can appear distorted.
There is a slight shine on the mini's that isn't very noticeable in person,so I think the lighting is doing some of it.I also use GW satin purity seal on my mini's as it doesn't come out shiny if your careful and offers nice protection in addition to not dulling a model down to much.I need to give a further inspection on the models and tone down any that are still to shiny.It was late when I applied the protective coat and took pictures.(My excuse at any rate):-)
I painted the skin tone a bit darker to reflect their Mediterranean background and choose some pretty bright colors for the clothes as this seems to really work for biblical period miniatures in my view.
I only added quick highlights to the speartips,crest,and clothes.I did not highlight the flesh,bone,leather and wood as this would have been very time consuming and defeating the purpose of army painter to produce units quicker then normal.
The shield cow hide patterns do not have army painter used on them and are hand painted to look like cow hide(I tried anyways).I wanted this hallmark of the Trojans to look nice and put a good foot forwrd here.:-)
A special thanks to Saxon Dog for the tips and advice on using army painter.:-)
I need more practice as I'm still leaving pools here and there on the mini's and I'm still unsure of just how much to use on them.Next up are some skirmishers where I can get some more practice.I'm hoping to be comfortable with the process before tackling any chariots as they are the center piece of Biblical armies.
Miniatures:Wargames Foundry


Friday, November 20, 2009

Trojan combined Spearmen /archer unit


Well folks here they are!This is my Trojans using the dip method.When you factor in time spent vs results then I must say I'm quite happy.I wasn't able to time myself,but it sure did speed up the process.The thought of painting all the flesh in my normal method makes my heart skip a beat!
The dip was brushed on and will require a few more practice runs before I get it just where I want it.
Army painter was brushed on everything except the shield cow hide patterns in which I hand painted this.The reason I hand painted the shields is I wanted the shields to look nice, because this is largely why I collected a Trojan army as I really like the cow hide on a large shield pattern and think of it as the hallmark of a Trojan army.I tried to achieve the hair like appearance these shields would have.
As far as highlights,I only applied a few light highlights to the clothes and spear tips.I applied no highlights to the skin,bone,leather or wood as that would have been very time consuming and thus defeating the purpose of using army painter.
The spears are very long as I've seen in some depictions.They run close to looking like pikes,but I like this look and choose to go with it.
The concept behind my army is a Trojan army close to the time of the Trojan war itself and therefore I will be mixing in early and late style equipment which many historians and the Iliad itself imply.
I personally don't care for light bases,but I cannot have a dark brown one for the Middle East/Asia and so I did some viewing on the internet and saw areas of a reddish desert color and I liked it and went with this tone as a compromise.I decided also to keep the grass dried and sparse in keeping with the region.
I also went with a very wide frontage as I both like the wide look and also to prepare for the soon to come updated rules(WAB2).
I hope some of you like it and I'm curious to hear what you think.:-)
Miniatures:Wargames Foundry


Thursday, October 22, 2009

Going for a "Dip"

Well,after a lot of asking questions around and viewing results I've decided I will give army painter a go.
I have a lot of miniatures sitting on my shelves(whole armies)that will probably never see a gaming table unless I try a different method.
I want every figure I paint to look great and that's fine if you only collect a few skirmish units or 1 or 2 armies,however I collect far more miniatures then that and basically I'm just wasting a great deal of money.Every time I look at my armies covering my shelves I feel overwhelmed and stressed.
After viewing several painters I realized army painter is my answer.I'll continue to paint some of my armies in my traditional manner and some other ones I'll go with army painter in order to finish some things.
What I like about army painter is the flexibility it seems to offer.Most other methods at 25mm or larger require you to completely paint them to include highlights in order to have a good result and cutting corners won't work.Army painter allows you to just paint the base colors and apply the shade giving you a decent result that is fine for the wargaming table.However,you can add highlights and "upgrade" the miniatures for a more pleasing appearance if you wish and that's very nice if you change your mind at anytime and decide you want a more quality finish.
For myself I can see this method will speed up my painting regardless if I do a basic job or add highlights for these reasons alone:

White or gray undercoat-I normally prefer a black undercoat,but I'll use white or gray when using army painter so the colors don't get lost.The big benefit will be it's easy to apply your paint in one coat saving quite a bit of time.

Black lining-No need for this with army painter and again this will save buckets of time as I won't need to keep re painting the black lines to keep them straight or from spillage.

Eyes-No need to do this tedious process that consumes massive time as it's a waste of time if your using army painter.

Less steps-You need only paint one shade per color and this of course saves massive time and even if you highlight that is only 2 steps.

If you combine all that listed above in terms of time,then of course my painting time will be hugely reduced!(Yipeeeeeeeeeee!!!!!!!!!)

It will be nice to paint some armies with my normal method and then paint some others in the loose army painter style and actually get some things finished.
I'm looking forward to trying this out and I really hopes this works as I really want to look at my mini's and think it's possible to play them all someday!

Well,I need to order some army painter tomorrow or this weekend and get started on my Trojans(Yep,decided I'll try AP with these too) and some ECW.Fingers crossed!:-)

Friday, October 16, 2009

To do or not to do that is the question

I'm not a huge fan of army painters or washes as I prefer my stuff completely painted,but I'm even less of fan of looking at a huge amount of unpainted miniatures on my shelves.
I have a very large ECW army(among others)sitting there and I would love to see it on a battlefield,but I have other projects that take precedence for the next year or two that I want painted to a high standard.
This situation has me thinking that Army painter might be the only real solution.I've seen some decent looking armies done with it and so I'm giving it some thought.
I did use a short cut with a black shade method on my Normans in 15mm and I'm more less pleased with time and results put in.Maybe I'll try the army painter with some of my 25mm stuff to get some things finished,allowing me to paint other armies to a high standard,but at the same time finishing other ones while I'm at it.
I'm still on the fence,but I'm close to getting off.

Tuesday, October 13, 2009

Meeting House


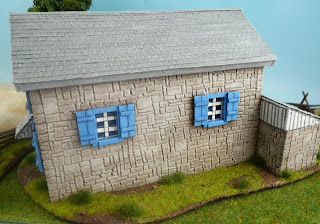
I imagine Giles is looking at this building and thinking something looks very familiar.:-)Indeed he would be correct!I based this meeting house heavily on his Old Kennett Meeting House with a few changes of my own.
I really liked the Old Kennett Meeting House he has in his blog,but not the price he paid for it.No doubt it's worth it,but I don't want to pay a large sum of money for terrain.So,my only answer was.........build it myself!:-)
It took some time to do as I made it out of balsa wood,foam card and just plain cereal box card,modeling knife,ruler,and pencil for stenciling .Overall,I'm pleased with the result and I plan on doing some more buildings.
I like the idea of a meeting house on the table as this reminds you were they gather to discuss the revolution and adds to the atmosphere.
Outside the Mayor greets the porter in an enthusiastic cheer as he brings much needed ammo and supplies to the local militia.
Buildings:My own
Miniature Company:Perry Miniatures


Civilians


This is the start of my civilian collection for scenery.I've been admiring these miniatures from the Perry's for sometime and now I've had a chance to paint a couple.The first is what I believe is a patriotic older gentlemen/mayor waving the marching troops on to victory or he could just be giving an enthusiastic greeting.
The second is a two wheeled tumbrel used to transport supplies and/or ammunition.
These models(like all Perry)have been a lot of fun to paint and I'm looking forward to doing some more.
Miniature Company:Perry Miniatures


.

Thursday, October 8, 2009

Baggage/Camp(15mm)

This baggage/camp is also black shaded like the rest.It's the beginning of what will be a larger baggage/camp when I'm finished.The nice thing about it is that I can use it for both my Normans and my Vikings as it pretty much works for both.
Miniature Company:Old Glory 15's

Norman Crossbowmen(15mm)


More black shaded Normans featuring some crossbows.These crossbowmen are also simply dressed like the archers and if anything are looked upon as even one step under as archers were often trained and skilled unlike the crossbowmen.This wasn't always the case of course,but often was.
Miniature Company:Old Glory 15's

Norman archers (15mm)


Here are some archers using the same technique I've used for the rest of the army.I kept the colors simple to reflect their status.Normans were not famous for their archery,but did have proficient archers available that they used with some effect.
Miniature Company:Old Glory 15's

Saturday, September 26, 2009

Norman Heavy Infantry


Here are some more Normans using the blackshade method.These are some heavy infantry with the better armored to the front.The shields are more plain and not as fancy as the knights to reflect their less esteemed status.I'm getting somewhere now with this army and I'm close to having a complete FOG/DBMM force. Next up some bowmen and crossbowmen,and eventually a camp and then I will have a standard force I can add to from time to time.
Miniature Company:Old Glory 15's


Tuesday, September 22, 2009

Bunker Hill


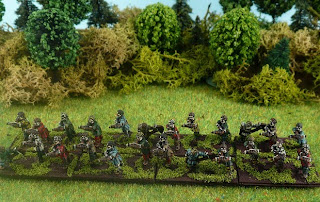
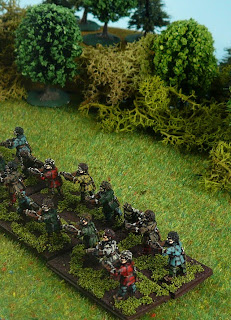
This is some militia I used of mine for an advert of Bunker Hill.A couple friends and myself plan on hosting a demo game of Bunker Hill for a large event here called TACTICA.The Standard was intended for another militia company I'm doing that was inspired by the troops at Bunker Hill and that explains the difference in color from the actual.It is amusing that we actually are going to do Bunker Hill and now the standard I put on the unit will be very appropriate if not completely accurate.
Miniature Company:Perry and Wargames Foundry.


Resizing

After going through my blog,I noticed some of my close ups were too close and this distorted the actual image of the pictures.With this in mind I made some adjustments and did some resizing.Now my pictures should all be in the proper perspective for viewing.If you have any suggestions or opinions,then please let me know.

Cheers
Christopher

Friday, September 11, 2009

Dismounted Norman Knights


Here are some more Normans from my picture files.Again,like I will do with this entire army I'm using the quicker black shade method as described under Norman knights.These knights decided to fight dismounted which was uncommon for Norman knights but did happen.Next up are some Norman heavy infantry.
Miniature Company:Old Glory

Norman Knights


Here are some Norman knights led by a converted William the Conqueror and Bishop Otto.It's perhaps a little more colorful then many Norman armies with the banners,but I like the extra color.I tried out using a different painting method to speed things up a bit.However,it really only works at 15mm and I wouldn't recommend it for 25mm and up.
The method is called black shading and it is where you just paint the raised areas and leave the folds and crevices in the base undercoat of black.From tabletop height it looks pretty good,but doesn't stand up to close inspection.I think it strikes a nice balance between looks and getting an army on the table in a pretty quick time.
This method should only be used to get armies on the table and not for display.This is fine because it allows me to focus my painting on my 25/28mm stuff that is worth the effort and at the same time I'm able to get some things done in the smaller scales.
I plan on using this army for DBA/DBMM and also for some Fields of Glory.
Of course these are also back logged pictures.
Miniature Company:Old Glory 15's


Wednesday, September 9, 2009

Sd Kfz 251's Halftracks


Once again,I'm adding more backlogged pictures.
This is my first attempt at painting vechicles.They are 3 Sd Kfz 251's and 1 Sd Kfz 250/9 that was sent on accident,that I then decided to use as my command track as it stands out from the others. ;)
I Like my vehicles dirty and worn,with a light mud,but not heavy caked on mud, because I don't think it turns out at this size very well.It was a real challenge painting them,because it's very different from what I normally do.I block painted them and did some controlled dry brushing, black lining,and a very little bit of ink.
I decided on an ambush camo scheme that I have always found to be very interesting.
I experimented with lighting,so please excuse the different shades. Perhaps, if you have time you could tell me which pics looked the best and any pointers. :D
Miniature Company:Flames of War